Create a Payment Request
How to create a payment link via payment request plugin.
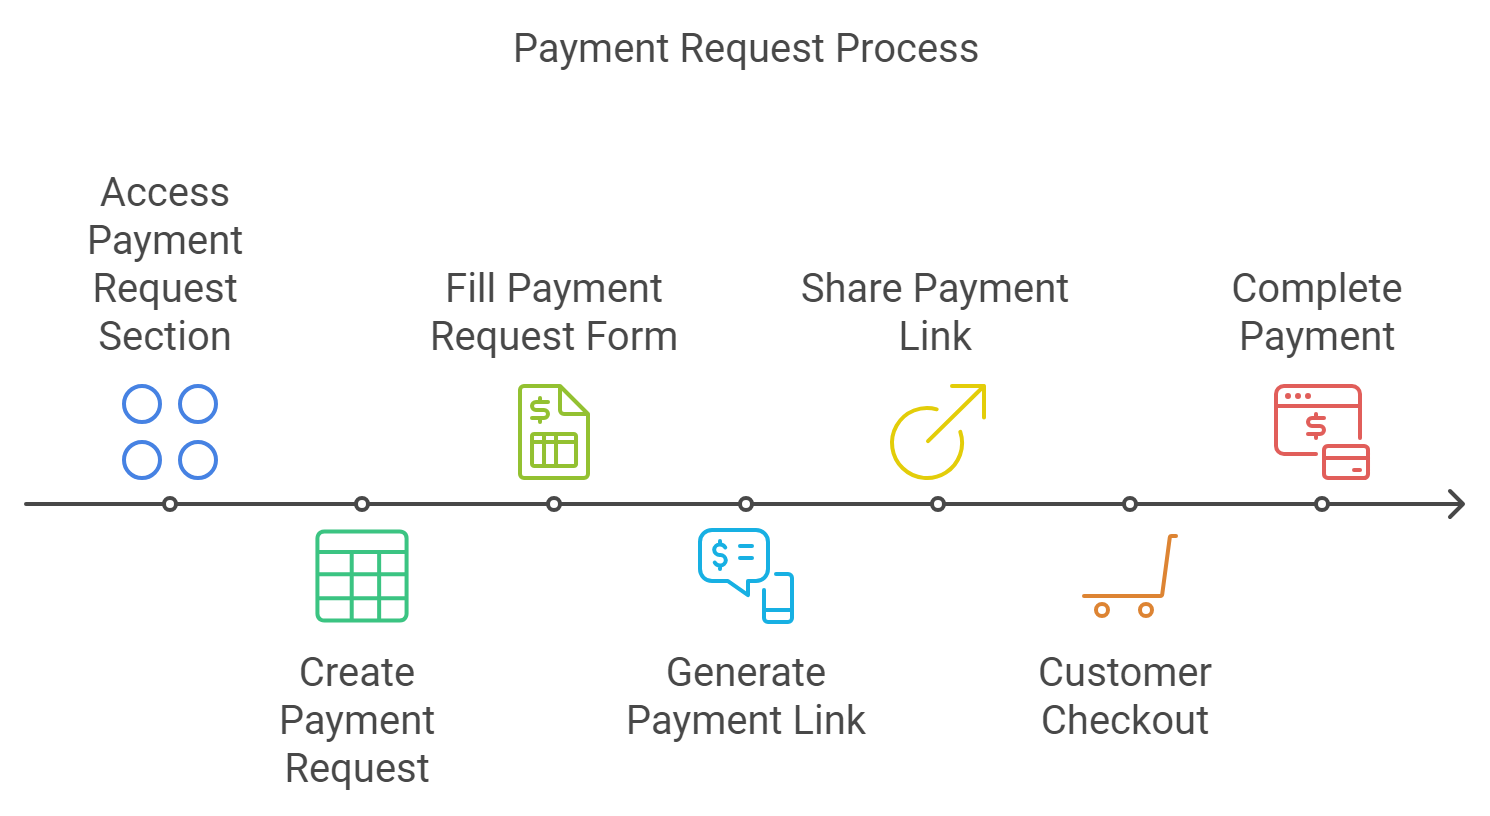
1- Navigate to Payment Request Section:
2- Create Payment Request:

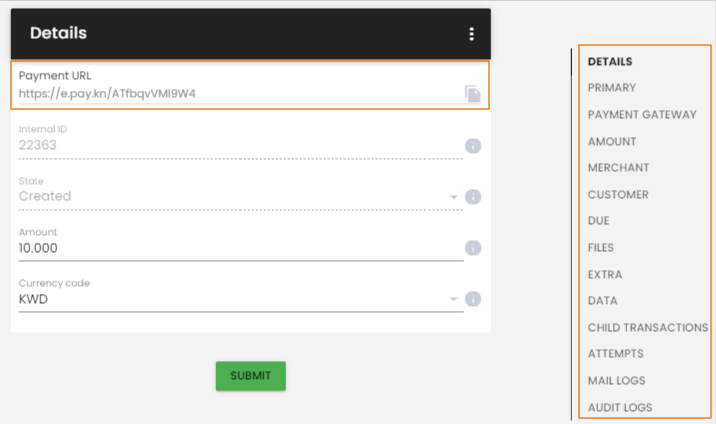
3- Fill Payment Request Form:
4- Generating Payment Link
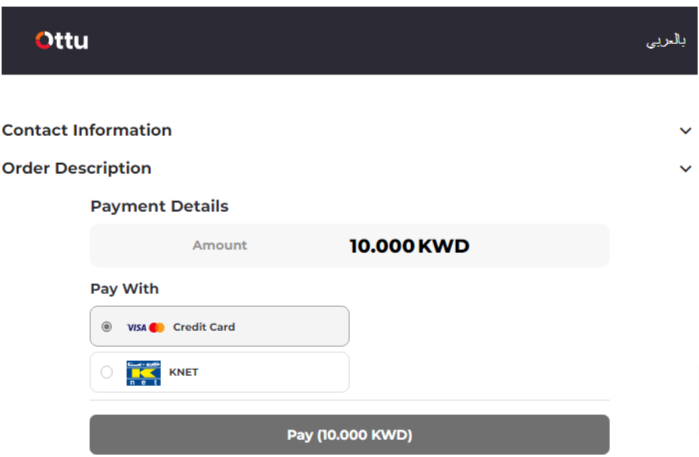
5- Checkout Page:
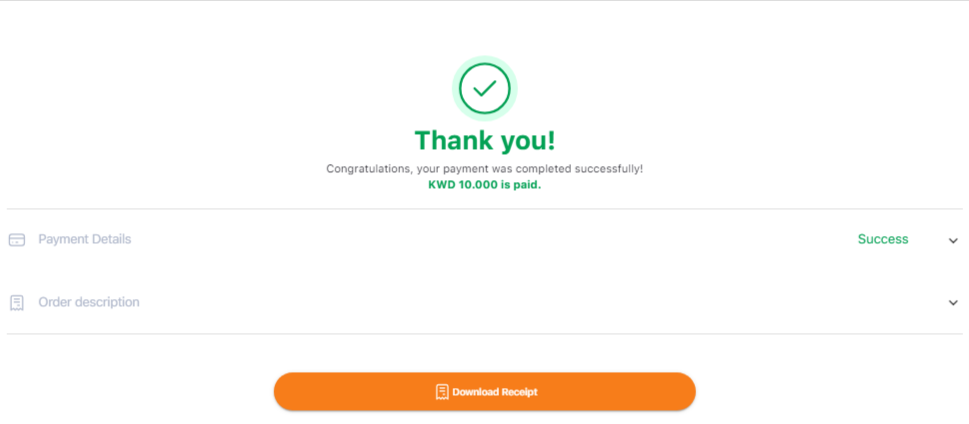
6- Completing the Payment